
Supreme, yes! Sure, driving a Tesla on a friendly country road is a supreme experience as well. So is skiing down the slopes of a Kitzbühel run in Austria. And so is perhaps sunbathing on a beach in Phuket, Thailand. But when it comes to nutritious and tasty bead, it is homemade 50% whole wheat sourdough — at least for us.
What is 50% whole wheat sourdough bread? It is sourdough bread crafted with 50% whole wheat and 50% bread flour. There are recipes out there on the Internet utilizing 25% whole wheat, even 75% whole wheat, and then some. Anything goes. We simply like 50% whole wheat best.
How To Bake Whole Wheat Sourdough Bread
We’ll explain how to craft this bread with the first-time home baker in mind. It is okay if you do not have a mechanical stand mixer in your kitchen. With a little bit of elbow grease, you may knead the modest volume of dough by hand.
The dough is likely baked in a standard kitchen oven, powered by gas or electricity. Ours is powered by gas, and we will utilize two Dutch ovens in these instructions. If your kitchen oven is powered by electricity, you may instead utilize baking steel or cordierite stone for an open bake.
Yes, this is a bit of an involved process. It is a labor of love, no doubt about that. But it is worth it, especially if sliced, plastic-bagged, off-the-shelf store-bought bricks are not a desired option. Our process makes two boules, with one (or both) easily kept in the freezer for weeks and later consumption. A sourdough boule with plenty of whole wheat also makes nutritious and yet tasty food to be shared with others or even gifted to family and friends.
Could sticky dough prevent you from trying? We admit sticky dough is a bit annoying. But there is often no way around it when baking high-hydration dough. The benefits — an incredibly fluffy or open crumb — outweigh the stress, though. French baker Richard Bertinet is a master at dealing with messy dough.
We recommend watching plenty of the many videos about crafting sourdough bread on YouTube.
And, if you find that baking sourdough bread will be your ‘thing,’ please read our review of stand mixers like the Nutrimill Artiste or the Bosch Universal Plus.
What Is Needed: Ingredients and Equipment
Obviously, besides the recipe and the instructions, you’ll need the ingredients and some equipment. You already may have some or even all of it in your kitchen. But if not, don’t be stingy but generously cover your bases.
Ingredients
Our list contains ingredients easily available in the US. If you live in another country, you may need to use substitutes.
Sourdough Starter
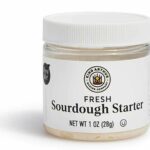
To begin with, you’ll need a sourdough starter or levain. We do not wish to cut corners by using store-bought active yeast, which would impair the full development of flavors. Preparing a potent sourdough starter from scratch takes a week or so. For a lot of home bakers, this is a bit of a nuisance as patience is costly in this day and age of instant gratification.
So, we recommend purchasing a ready-made sourdough starter from King Arthur Baking Company for under $10. Just follow the instructions and your starter will be ready to use within a few hours. When you feed it (all you need is flour, water, and a little bit of patience), it quickly becomes your own, adapting itself to your region and climate.
Flours
Alternatively, if you know an artisan bakery in your neighborhood, you may visit it and ask them for a bit of their starter. Just bring a little jar along.
Our recipe incorporates three flour types. One type is bread flour, another is whole wheat flour, and a third is rye flour.
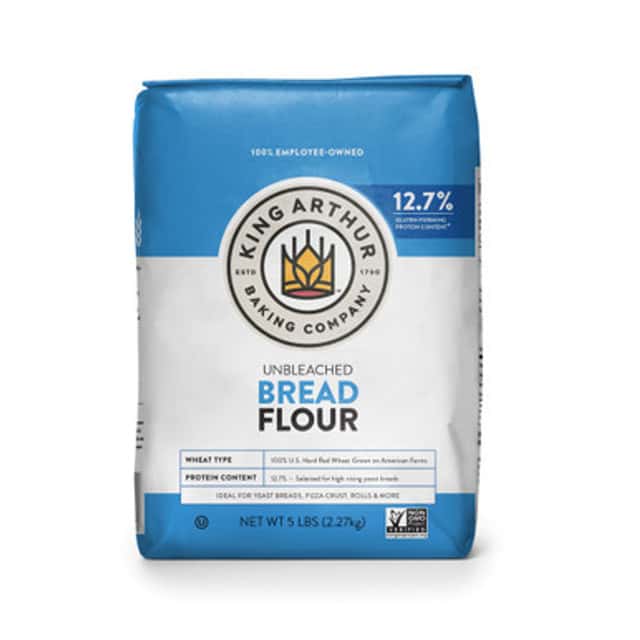
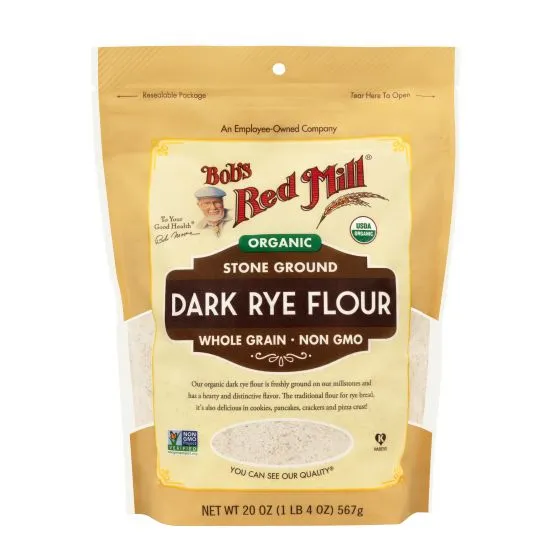
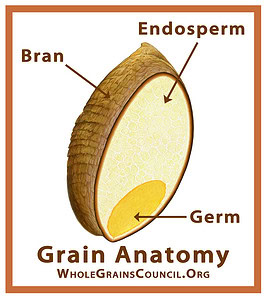
High-rising bread flour is ground from the kernel of wheat berries that have a fairly high protein content. Nutritious whole wheat flour is ground from whole wheat berries that have not removed their bran and germ. Dark rye flour is ground from a most flavorful whole rye berry.
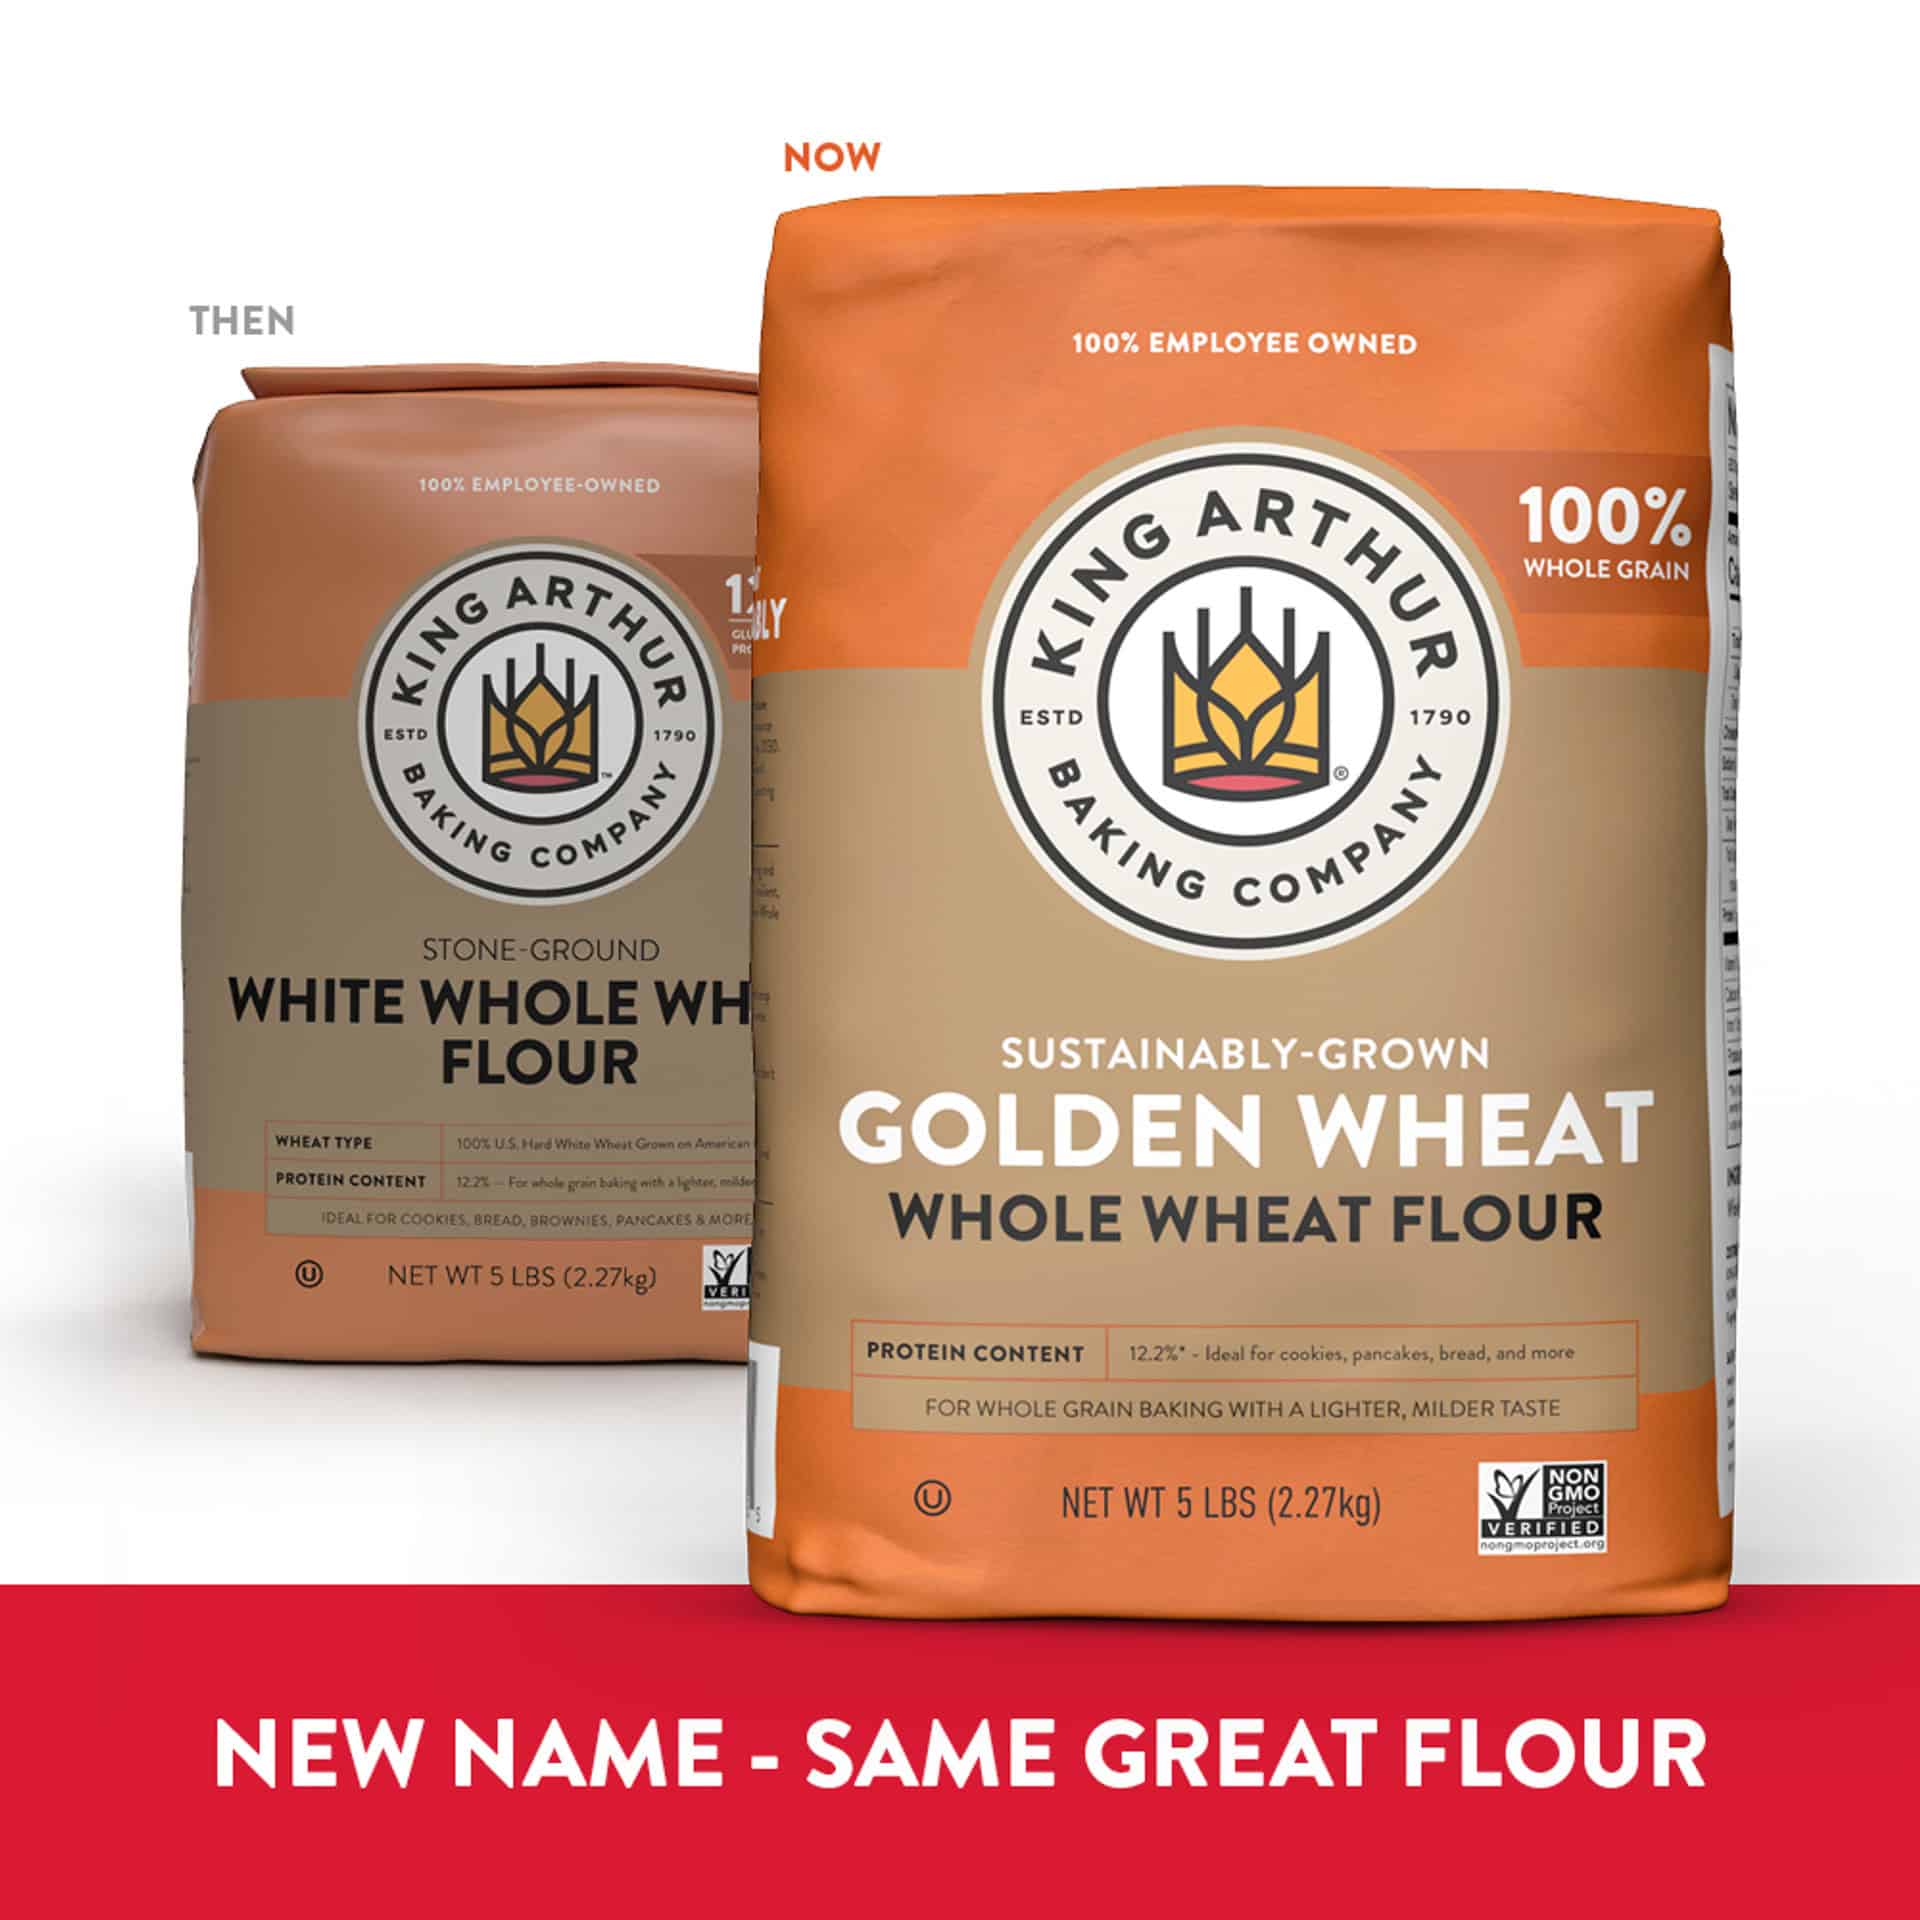
A little on the confusing side, whole wheat flour comes in two kinds. The short story is that there are ‘white’ and ‘red’ wheat berries from which whole wheat flour can be ground. Most whole wheat flour is ground from red berries, while some whole wheat flour is ground from white berries. Why? Whole wheat flour ground from white berries has a bit milder taste and a lighter color than flour ground from red berries. White whole wheat flour provides the same nutritional qualities that people generally cherish red whole wheat flour for.
We recommend using the Golden Wheat flour from King Arthur, or any white whole wheat flour from another miller. King Arthur sold that uncommon flour as White Whole Wheat Flour. In 2024, the company changed the name of that flour to Golden Wheat to differentiate it from the typically white or all-purpose flour.
All these flours are readily available in better food stores and online. King Arthur Baking Company, Bob’s Red Mill, Farmer’s Direct Foods, and Central Milling — among others, are companies that we know to produce quality flour because we tried theirs.
A Secret Ingredient
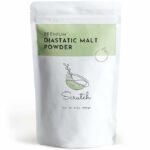
We add a few grams of diastatic malt powder to the mix of flour, water, and salt. What is diastatic malt powder? Diastatic malt is a type of malt made mainly from sprouted barley that contains diastase enzymes. It is added to dough formulations to provide additional food for yeast, aids in the strengthening of the gluten network, and improves loaf color, volume, and texture.
King Arthur’s bread flour, like many other bread flours, is already malted. Its packaging lists enzymes in the flour’s ingredient list.
Diastatic malt powder should be used in very small amounts. Bakers recommend a range of about 0.25% to 1% of the total weight of flour. In our case, that would be 0.25% to 1% of the total weight of whole wheat flour.
However, whole wheat flour is typically not malted. So, we add diastatic malt powder only in proportions to the unmalted flour in the blend.
Salt
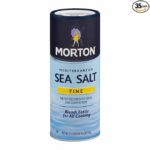
Salt is not only a natural preservative, it also brings out the flavors of its salted foods. We recommend fine sea salt because its grains dissolve easier in the moist batter than coarse sea salt.
There really is no need to use pink Himalayan salt, or any other fancy contortion, as pinkness stems largely from mere impurities in the matter.
Water
Needless to say, good drinking water is precious. Make sure that the water is non-chlorinated. Most tap water should be fine, especially if filtered by a home system such as Britta. At times, we use bottled Spring water.
Equipment
You will need a few tools to work with. We simply got most of it on Amazon. Following is a short list of what you might need.
The Kitchen Oven
Today’s homes often sport a gas oven, while more modern homes may have an electric oven. Does it matter? If baking the bread in a gas oven, it is best to use Dutch ovens. If baking in an electric oven, the bread can be baked on steel or cordierite stones with added steam into the oven’s cavity.
All gas ovens have a few vents built in for safety, but this makes it hard to contain the steam that needs to be added if bread is baked naked on steel or stone. Dutch ovens hold the steam released by the moist dough within their contained cavity. Steam prevents the surface of the moist dough from hardening too soon which would prevent the dough from rising.
Dutch Ovens
Some Dutch ovens are basic, cheap, yet fully functional. Others are dedicated to bread making and can be a bit expensive.
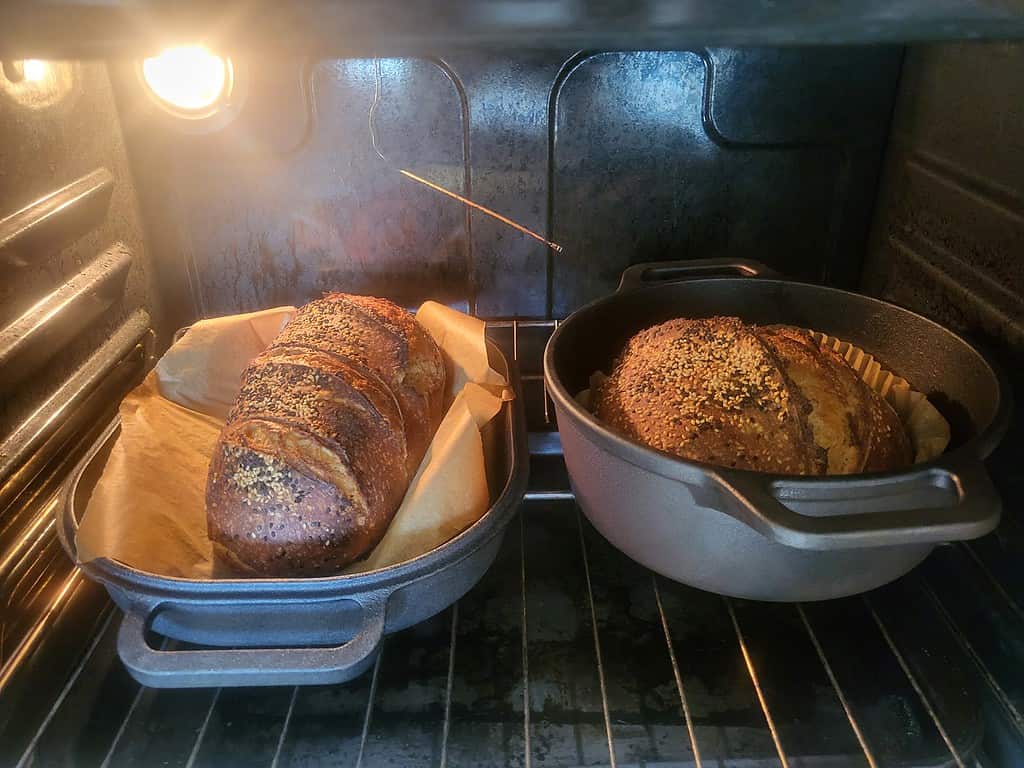
In the above photo, we are using a dedicated bread pan (shown on the left) and a general 4-quart pan (shown on the right), both without their corresponding lids and lined with parchment paper. The bread pan on the left is kind of elongated and lends itself to baking batards and then some. The general pan on the right is a typical round and lends itself to baking boules and then some.
If you do not have a 4-quart Dutch oven, we recommend getting two. They can be found at yard sales, at thrift stores, and/or on Amazon for as little as $40 if on sale.
Whisks, Bannetons, Bread Lame, Spatulas, and Dough Scrapers
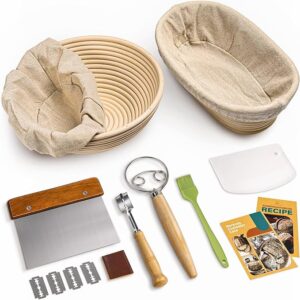
Bannetons and associate tools are a must-have. Bannetons are used to contain the dough to rest, proof, and ferment overnight in the fridge. Some are ovals, some are elongated, and some are round. Use the form that fits your Dutch ovens. Midsized or 10-inch bannetons are best for our recipe.
A sturdy whisk helps with blending the various dry flours before adding water, as well as mixing the flour blend with the water in a bowl.
A bread lame is a sharp blade on a handle and is used to score the proofed dough just before baking. The score sets where and how the dough will expand.
A bendable, rounded scraper (the white thing in the photo) or spatula helps with releasing the dough out of the bowl and a firm metal scraper (the rectangular metal thing in the photo) help with cutting the dough into pieces and shaping each into a form that is fitting for the bannetons.
A silicone flour brush (the green thing in the photo) is helpful at times to get dry flour out of nooks and crannies, but is perhaps not necessary.
Silicone Slings
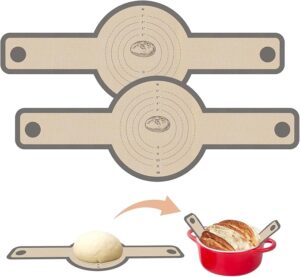
Transferring the proofed dough into and out of a hot Dutch oven is best done with a silicone sling.
The silicone sling also replaces any parchment paper by shielding the dough from burning on the bottom of the pan or even sticking to the cast iron.
Oven Mitts
It is easy to get burnt when handling hot Dutch ovens in a hot kitchen oven. Using a good pair of heavy-duty mitts with long sleeves is in order. We also keep some soothing, first-aid skin lotion handy — just in case.
Large Bowl
Any large kitchen bowl can work. Ceramics, aluminum, steel, even wood will work just fine. But it has to be large enough to hold the splashing ingredients and then some.
Cooling Rack
When the bread is ready to come out of the oven, it is hot. Hot, hot, hot, and it needs to vent, including underneath. Place the bread on some kind of cooling rack for a couple of hours before getting to it.
Shower Caps
Believe it or not, we do use cheap shower caps to cover the bannetons once filled with shaped dough. We do not want the dough to dry out in the refrigerator during cold fermentation. However, any other material, like a smaller plastic bag, will work as long as it keeps the dough hydrated.
Kitchen Scale

Some recipes give measurements for ingredients in volume, like cups. It is a bit imprecise; for example, a cup of flour weighs differently from a cup of water.
Baker’s math and our instructions measure in weight, that is, in grams or ounces.
A scale with a pull-out display is easier to read even with a large bowl on top.
Silicone Baking Mat
Unless you have a nice work table with a surface safe for food preparation in the kitchen, we recommend using a large silicone baking mat. They are cheaper than large wood cutting boards, clean up easily, and roll up conveniently for storage.
Bottle Brushes and Scouring Sponges
Believe us, working with dough can be a bit messy. Most every baking instruction misses the fact that the baking equipment will need to be cleaned after the deed. If your kitchen is not already well stocked, get a variety of hard and soft brushes and pads.
Dough residue is easiest to clean up while still fresh and wet. Otherwise, we let the residue dry for a longer while as it then comes off by scraping, etc. Instead of sending the residue down the drain, we rather dispose of it in the trash or use it as fertilizer in the garden.
Recipe
Here we go now. Again, the measurements are in grams. A few grams more or less do not make much of a difference, except when it comes to ingredients of smaller proportions (salt, malt powder). Do not intentionally skimp on the salt because your doctor told you so, it is needed. To make wholesale adjustments to this recipe, that is, to modify the recipe for 4 loaves or so, feel free to use our Sourdough App.
Time Frame
Authentic sourdough goods made the old-fashioned way with natural yeast and bacteria take preparation and baking time. The sourdough starter usually takes at least a week or two to develop from scratch. By using the Fresh Sourdough Starter from King Arthur Baking Company, or a similar product from another provider, this lengthy and trying time to raise a sufficient quantity of active sourdough culture is shortened to a day or two.
The recipe above calls for nearly 200 grams of starter, which is a bit more than the 28 grams of ready-made sourdough starter in the jar that King Arthur Baking Company provides. On the days preceding prep day, that ready-made sourdough starter has to be fed with additional water and flour to bring its weight up to cover the recipe’s required quantity and then some. The starter has to be ready in quantity and quality on prep day.
Prep day is the day when all ingredients are combined, kneaded, bulk-fermented, pre-shaped, shaped, and dropped into bannetons. These are then placed into a refrigerator for overnight cold-fermentation. This is a long work day at home.
Bake day, the next and final day, is the day on which the bannetons holding the cold-fermented dough are taken out of the fridge, turned over to release the dough onto silicone slings, and when the dough is scored and baked in Dutch ovens. This is usually done in the mornings and is a short work day.
Starter
The recipe requires 192 grams of ‘ripe’ starter. Some bakers feed their starter with AP flour, others add a bit of whole wheat and/or rye flour to the blend for bread flavor. There is no absolute right or wrong.
You may follow the instructions that came with the fresh sourdough starter from King Arthur Baking. We also feed our starter with flour and water in equal amounts to make the starter 100% hydration.
Final Dough
| Ingredient | Weight | BP |
| Whole Wheat Flour | 462 grams | ~50% |
| Dark Rye Flour* | 15 grams | |
| Diastatic Malt Powder | 4 grams | |
| Bread Flour | 384 grams | ~50% |
| Water | 624 grams | ~75% |
| Salt | 19 grams | ~2% |
| Starter (100% hydration)** | 192 grams | ~10% |
* Dark rye flour is considered whole wheat.
** 100% hydration means the starter is made from ruffly equal parts of flour and water.
The gross weight of each of the 2 doughs is ~850 grams. As some of the water in the dough will evaporate as steam during baking, this recipe will yield two loaves of about ~720 grams each.
Instructions
Make sure that you have more than 200 grams of ‘ripe’ starter at hand. After dispensing the required ~200 grams into the main dough, use the remaining starter as a base for a new batch down the road.
The trickiest part of the entire process is perhaps the final shaping of the dough into a form that is fitting for the bannetons/Dutch ovens. This shaping of the dough is more than just getting it to fit the bannetons. Shaping also strengthens the exterior of the dough so the raw loaf will hold its shape during scoring and baking. This part is hard to convey via words. We gladly refer to a video made by Maurizio Leo, a baker at The Perfect Loaf, for how to shape the dough.
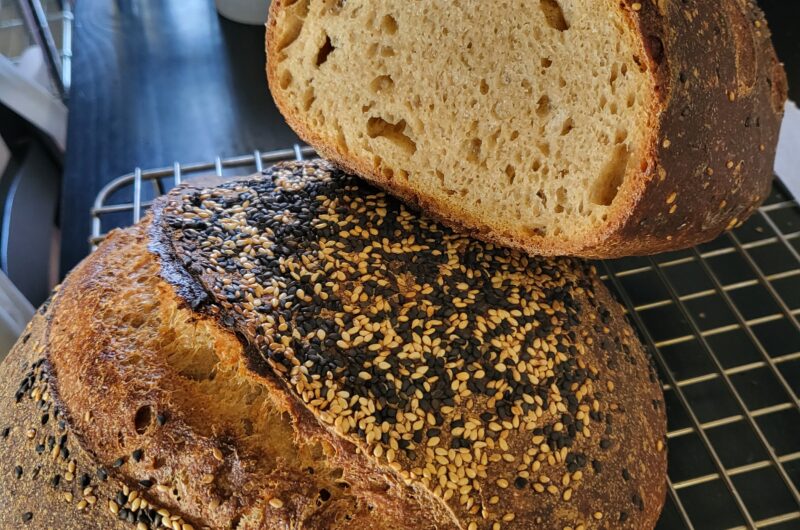
Two Boules of 50% Whole Wheat Sourdough Bread
Difficulty: Intermediate2
servings2
days50
minutesLast updated: 3/6/2025
On the first or prep day, you prepare the dough for cold fermentation overnight in your fridge. On the second or bake day, you bake. About 200g of ripe levain must be available on prep day before getting on with this recipe.
BP stands for Baker’s Percentage. The recipe’s relatively high water content may make the dough a bit sticky. Other factors such as variations in temperature, humidity, duration, handling, etc., play on each other. This makes baking sourdough more of an art than a science. It is best to watch some videos on crafting sourdough bread on YouTube or Instagram.
Formula
- Preferment
Ripe Starter (Levain) – 192g (10% BP) made with AP or bread flour at 100% hydration
- Flour
Whole White Wheat Flour – 462g (50% BP)
Rye Flour – 15g (counts as whole wheat flour in BP)
Diastatic Malt Powder – 4g
Bread Flour – 384g (50% BP)
- Water
Non-chlorinated Water – 624g (75% BP)
- Salt
Fine Sea Salt – 19g (2% BP)
- Yield
Gross Dough Yield – 1700g or 850g per dough; the baking process will steam off about 15% of the moisture in the dough, reducing the final weight of a finished loaf to ~722g.
Directions
- PREPARATION
- About 200g of ripe levain must be available before getting on with this recipe.
- Day 1 – Prep Day
AUTOLYSE LETS WHOLE WHEAT FLOUR ABSORB WATER AND SOFTENS THE BRAN - Start around late morning, say 10 am.
- Blend the dry whole wheat flour, bread flour, rye flour, and malt powder by hand or with a whisk in a large tub or bowl. Add the water and mix the batter until all flour is well incorporated and wet. Do not knead the batter yet.
On hotter days, use ice-cooled water; on colder days, use lukewarm water. The batter’s desired temperature would be between 75°F and 80°F. - Let this batter soak for about an hour. This is called autolyse.
- THOROUGHLY MIX THE INGREDIENTS BY HAND OR DOUGH MIXER
- Gradually add the levain into the batter and mix by hand or with a strong whisk until light/dark streaks in the batter have disappeared and the batter looks uniformly shaggy. Gradually add the salt to the batter and continue mixing by hand or with a strong whisk until the salt has dissolved.
- Continue kneading the batter for 8 to 12 minutes in the bowl or on a silicone mat. The batter will gradually change consistency to become more like dough. Working this high-hydration dough requires kneading for a good while as it will strengthen the gluten threads and make the dough elastic. This will be a good exercise if all is done by hand. Alternately, work the dough in a stand mixer at low-to-moderate speed for 6 to 10 minutes. Work the dough until it becomes smooth and elastic, much like Play-Doh.
- Use the windowpane method to check that the dough has achieved the proper elasticity. Grab a small piece of dough with a thumb and two of your fingers between each hand and gently stretch the dough out. The dough, if ready, should not tear and appear transparent − like thin skin or a fogged window. If the dough still tears easily, keep kneading the dough for longer.
It is difficult to over-knead a moist dough by hand. - BULK FERMENTATION WITH STRETCH AND FOLDS EARLY ON
- Bulk fermentation starts when mixing the starter in with the flour/water batter. By now a dough, this moist or high-hydration mass will now benefit from 4 sets of stretch-and-fold maneuvers, preferably during the first 2 hours after a windowpane test indicated a well-developed dough, and in 20 to 30-minute intervals.
Each of the four sets of stretch-and-fold maneuvers takes about a minute and comprises four stretches and folds each. Four times four stretch-and-fold make for 16 stretch-and-fold.
With a moistened hand, grab up to a quarter of the dough’s perimeter, pull the portion up and stretch it out a bit, then fold it back into the main portion of the dough and press it down a bit. Repeat this process four times, turning the bowl a quarter-turn each time to complete one set. - Let the dough relax for 10 to 20 minutes between each stretch-and-fold set. Over time, the dough will become less shaggy and more elastic. However, the dough will noticeably tighten quicker by the third or fourth set of stretch-and-fold. After four sets are completed, grab and invert the batch of dough so the seam side faces down.
- Cover and let the dough relax (bench rest) and ferment for a few more hours. Look for the dough to have risen from its original volume by 30% to 50% and have become slightly domed with noticeable bubbles emerging. Shaking the vessel a bit should make the dough wiggle like jello.
Bulk fermentation might take as little as 2 to 3 hours in warmer temperatures or as much as 5 to 8 hours in cooler temperatures. The time allowed for bulk fermentation depends not only on ambient temperatures but also on the strength of the starter, the type of flour used, and the level of hydration. This is to say that there is a bit of leeway or elbow room in the process as a lot of factors play out. - DIVIDE AND PRE-SHAPE
- Lightly flour a flat work surface and ease the dough out of the fermentation vessel onto the work surface.
When sticky dough is released onto the lightly floured surface, it becomes a bit less sticky on the bottom but will remain sticky on top. Simply try not to touch the more sticky upper side of the dough. - With a dough scraper, gently shape the batch of dough into a more uniform round.
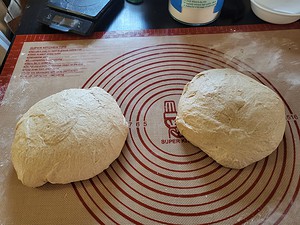
- Divide the dough into approximately two equal pieces of about 850g. Shape each dough into an approximate round or oval.
- Stretch out and pat each batch of dough a little without trying to flatten or degass it too much. Gently stretch-and-fold a few outer sections of each batch into the middle and press down to seal and to build strength for the dough to better hold its shape. Turn the dough over, leaving the dough’s less sticky underside on the top. With hands and dough scraper, slide each dough around the work surface in a somewhat circular motion to create surface tension on top.
- Cover, and let the two batches bench rest for 20 minutes to relax again to become extensible for final shaping.
- FINAL SHAPE
- Prepare two cottoncloth-lined bannetons. If they are brand-new, dust their inside cavity with a bit of flour to make it more non-stick.
- Sprinkling into the cavity a bit of black and white sesame seed.
- The final shaping of the dough can be difficult. Again, fold a few sections from the circumference of each dough into the middle and press down to seal. Use a dough scraper to slide the dough over the work surface and into the desired form, thus helping the dough build strength and keep in shape.
- This brief, written description of shaping the dough does not do justice to the art. It is simply best to watch a few demo videos about how to shape this moist sourdough. Instead of reinventing the wheel and making my own videos, I recommend reading and watching Maurizio Leo’s extensive demo of the process at https://www.theperfectloaf.com/guides/shaping-a-boule/
- Gently flip each dough over into a banneton seam-side up.
- Stitch up any gaps left between seams to create a smooth, airtight surface.
- COLD FERMENTATION
- Cover each banneton loosely with a shower cap or other cover to prevent the dough from drying.
- Be done for the day in the late afternoon or early evening.
- Day 2 – Bake Day
PREHEAT KITCHEN OVEN - Start preheating the kitchen oven early in the morning. Make sure that the two cast iron Dutch ovens are inside. Preheating the Dutch ovens is crucial for achieving a proper rise and crisp crust. It may take up to an hour to get the cast iron hot enough.
If you have an electric oven, you may open bake the bread on baking steel or cordierite stone instead. - RETRIEVE BANNETONS, RELEASE AND SCORE LOAVES
- Remove the bannetons from the fridge and tip them over to allow the proofed loaves to drop onto a silicone sling (or precut heavy-duty parchment paper).
- Dust the top of the loaves with a bit of flour.
- Score the loaves’ tops with a lame or sharp knife at a 30° angle to the surface at a 1/4 to a 1/2 inch depth. This scoring might feel like hurting the raw loaves and they may flatten a bit.
- BAKE LOAVES
- Carefully place each silicone sling carrying a dough into an uncovered Dutch oven.
- Cover each Dutch oven with its lid and place them back into the hot kitchen oven.
Please keep in mind that a kitchen oven’s temperature knobs and gauges are not necessarily all that reliable and that loaves can be smaller or larger, and adjust temperatures and baking times accordingly. - Bake for up to ~10 minutes at 500°F.
- After 10 minutes, reduce oven heat to ~475°F and keep baking the loaves for about ~15 to 20 minutes.
- After all 25 minutes or so of baking, carefully remove lids from both Dutch ovens. Continue baking loaves for another 15 minutes at 450°F or until a desired browning is reached.
Baking the loaves to at least 190°F internal temperature will make for a moist but fully baked bread, while baking to a more traditional 210°F will make for a little drier bread. Loaves baked to these temperatures are safe to consume as all starter microbes will have sacrificed their lives and died. - After baking the loaves, remove them from their Dutch ovens and place them on a cooling rack. Loaves will be very hot and still setting on the inside. Let the loaves rest on a cooling rack for 2 or more hours to reach at least ambient temperatures before slicing.
- LET LOAVES COOL BEFORE SLICING